• Menu
Home › Tutorials › Preparing garments in MD/CLO
Blog Menu
Tutorials
  • Installation and Activation
    • System requirements
    • Installation
    • Malware false positives
    • Bugs and issues
  • Using uDraper plugin
    • Setting up Draper components
    • Ready-to-wear clothes
    • Design clothes in 3D Draper
    • Import clothes in UE
    • Running cloth simulation in UE
    • Geometry Cache
  • Marvelous Designer & CLO
    • Preparing garments in MD
      • Clothes with layers
      • Pleats and folds
      • Shrinkage
    • Import from Marvelous Designer
    • Using MD OBJ files
  • Advanced uDraper
    • Refitting clothes
    • Using native UE materials
    • Wind functionality
    • Reducing Collider Mesh
    • Using clothes in OBJ format
      • Optimizing OBJ files for wrapping
    • Changing clothes at runtime
    • Using with Path Tracing
    • Simulation cache
    • Packaging SDK
  • 3D Draper
    • 2D Design
    • Sewing, Zippers, Buttons, Pleats
    • 3D Draping
    • Mannequins and measurements
    • Materials and textures
    • Import/Export

Preparing garments in MD/CLO

  1. Open Marvelous Designer and import your collider mesh as your avatar.
    • Usually, the Scale is set to centimeters (100%)
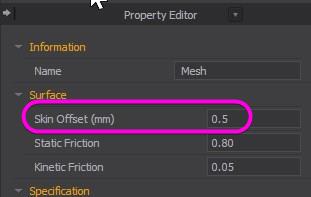
    • You may also want to decrease avatar’s skin offset down from the default 3mm (e.g., to 1mm or 0.5mm). .


  2. Open a simple garment and adjust its position on the avatar.
  3. If you want to apply different material properties to different patterns in Unreal Editor, you need to create additional fabrics and specify the patterns associated with these materials.


  4. You may also want to change the vertex distance to be higher than 10mm, e.g., 15 mm. 


  5. Note that only one garment can be exported at one time. Make sure all the patterns/pieces of the exported garment are sewn together.
     
  6. Keep in mind that Zipper, Buttons, and other 3D objects will not be imported in uDraper. Hence, make adjustment to your garment design to ensure the pieces are sewn together as required instead.
     
  7. If you want Topstitches to be rendered in UE, select Texture for the Topstitch Type. Later, you’ll need to use Bake textures option when importing to uDraper.


  8. Start the simulation and make sure the garment is draped correctly. Then, stop the simulation.

Refer to the following article on how to import garments from MD to uDraper:

  1. Automatic import clothes from Marvelous Designer (new)
     
  2. Using clothes in OBJ format from Marvelous Designer or CLO (old)
     
  3. See the following articles on how to handle certain cases:
  • Clothes with Layers,
  • Pleats and folds,
  • Shrinkage.
Tutorials
  • Installation and Activation
    • System requirements
    • Installation
    • Malware false positives
    • Bugs and issues
  • Using uDraper plugin
    • Setting up Draper components
    • Ready-to-wear clothes
    • Design clothes in 3D Draper
    • Import clothes in UE
    • Running cloth simulation in UE
    • Geometry Cache
  • Marvelous Designer & CLO
    • Preparing garments in MD
      • Clothes with layers
      • Pleats and folds
      • Shrinkage
    • Import from Marvelous Designer
    • Using MD OBJ files
  • Advanced uDraper
    • Refitting clothes
    • Using native UE materials
    • Wind functionality
    • Reducing Collider Mesh
    • Using clothes in OBJ format
      • Optimizing OBJ files for wrapping
    • Changing clothes at runtime
    • Using with Path Tracing
    • Simulation cache
    • Packaging SDK
  • 3D Draper
    • 2D Design
    • Sewing, Zippers, Buttons, Pleats
    • 3D Draping
    • Mannequins and measurements
    • Materials and textures
    • Import/Export